


Technology
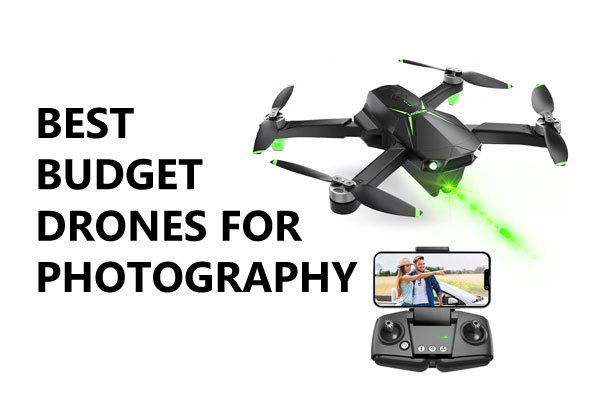
Best Budget Drones for Photography 2023
Get Coupons


Best Budget Drones for Photography
Best Budget Drones for Photography 2023: Are you someone whose fascination with the evolution of technology has sparked a keen interest in drones, prompting you to seek out the ideal model to invest in? You’re in the right place. Here, you’ll find comprehensive information to guide you on how to choose the Best Budget Drones for Photography.
Drones represent one of the most groundbreaking technological innovations in recent years. Nowadays, they’ve seamlessly integrated into various aspects of our daily lives. It’s not uncommon to witness these flying devices in action.
Admit it, who hasn’t harbored a desire to own one of the top budget-friendly drones? Functioning akin to a real helicopter, these devices are equipped with video cameras capable of capturing excellent-quality footage. Drones offer a plethora of possibilities, extending beyond mere recreational aerial shots. They’re frequently utilized for diverse purposes, from capturing moments at weddings to aiding law enforcement agencies in surveillance operations. Not to mention their myriad applications in the film industry.
Even in the realm of affordable drones, these devices boast a sensor that captures impressive videos and photos. They are loaded with numerous advanced features and cutting-edge technologies, enabling breathtaking maneuvers during flight. Their popularity has surged dramatically over the years, resulting in numerous brands venturing into this market, offering their own array of products. However, the unequivocal recognition must be accorded to DJI, a company that continues to dominate the sector. Thanks to its models catering to diverse needs and their unwavering quality, DJI remains the undisputed leader in the drone industry.
While DJI dominates the high-end market segment, it’s essential to highlight that there are several other companies producing equally impressive products at significantly lower prices. We highly recommend exploring our selection as we’ve curated the most compelling options for those seeking quality without breaking the bank.
To clarify, when we refer to affordable drones, we encompass not only portable models, which offer the convenience of foldable arms and propellers but also those priced below the 300 euros threshold. With that in mind, in the following paragraphs, we present what we believe are some models worth considering or, at the very least, worth evaluating, especially when considering these specific criteria. Each model comes with a concise overview of its technical specifications and functionalities. Additionally, we provide links to online stores where you can delve further into their features or potentially complete your purchase.
How to Choose Best Budget Drones for Photography
Following the rundown of top portable drones, we find it valuable to offer a brief guide on selecting a model that meets your requirements. Understanding the key factors is crucial to avoid ending up with an unsuitable drone or overspending on a product that doesn’t deliver as expected.
Evaluating Camera Sensor Quality
The camera sensor stands as the primary element since drones are primarily used for video recording. Assessing sensor quality can be challenging as technical specifications often don’t fully reveal its actual performance. Field tests become imperative to ascertain the level of detail. Don’t fret over a 5MP sensor in your chosen model; sensor size matters more than capacity. Larger sensors, capable of capturing ample light, are typically found in expensive options like the DJI Mavic 3.
Recording Resolution
Sensor quality is critical, but resolution is also worth considering, although it’s not solely indicative of quality. For those requiring high-definition content, opting for a drone that captures native 4K images is recommended. Alternatively, a solid 1080p model offers ample detail. Pay attention to the video refresh rate as well; entry-level models might be limited to 30 FPS, adequate for amateurs but lacking in fluidity and quality. Opting for 60 FPS ensures smoother images, yet this might result in less light captured by the sensor, leading to dimmer shots, particularly in low-light conditions.
Stabilization in Budget Drones
While stabilization doesn’t directly impact video quality, it’s crucial for avoiding shaky footage. Drones with at least 4 propellers generally offer good stability. For enhanced stability, consider the number of axes. More axes mean better real-time understanding of the drone’s position, ensuring stability in various situations. A model with 6 axes is preferable over one with 3 axes, particularly in complex scenarios like windy conditions or navigating obstacles.
Range Considerations for Affordable Drones
When considering a drone purchase, evaluating the range for aerial shots becomes pivotal. This parameter significantly impacts the final product cost, as high-quality antennas and radio remote controls incur greater development expenses. Entry-level drones typically cover a few hundred meters, while pricier models for personal use can exceed 10 km. For longer distances, GPS becomes essential for safely retrieving your drone in case of issues. However, adherence to various regulations is crucial to avoid penalties.
Ease of Use with Budget Drones
Often overlooked, ease of use is pivotal as a challenging-to-fly drone is likely to be abandoned after a few minutes. Radio controls play a crucial role here. They offer more intuitive handling, especially for beginners, featuring sticks akin to those found on console controllers. Yet, models equipped with an official app allow monitoring the drone’s view on your device screen and facilitate returning to the takeoff point. Additional ease-of-use features include automatic return and adjustable propeller speeds. Moreover, for longer distances, using the remote control is preferable, as smartphone connections tend to be limited, sometimes reaching only 100 meters.
Understanding Range in Affordable Drones
Battery capacity is the Achilles’ heel of handheld drones. Higher capacities don’t always mean extended flight times, as overall weight and efficiency impact the range. Checking the flight minutes, often mentioned in product descriptions, provides insight into a drone’s actual autonomy. Typically, these devices offer flight durations of around 20 to 30 minutes.
Significance of a Quality Mobile App
The quality of the manufacturer’s free application significantly influences the flying experience, especially for high-end drones featuring numerous advanced features. An intuitive interface and convenient shortcuts within the app for controlling the drone’s main aspects enhance the overall usability.
Consideration of Spare Kits
Many budget handheld drones are sold individually or in kits including spare propellers, extra batteries, and a carrying bag. Beginners often require spare parts, making the inclusion of these accessories in the offer an important consideration. Batteries, in particular, can be costly and challenging to recharge in certain locations, underscoring the value of having multiple batteries.
Approaching Flying Budget Drones
Mastering piloting skills might prove more challenging than anticipated, which is normal for beginners. Minimize potential mishaps by thoroughly reading the manual and watching YouTube tutorials specific to your drone model. While modern drones are durable with available spare parts, preventing accidents is preferable. Exercise extreme caution when operating drones near people.
Consider using a flight simulator for practice before piloting an actual drone. Seek guidance from experienced drone groups in your vicinity to learn and exchange experiences. Initially, opt for spacious and unobstructed areas. Pay attention to weather conditions and avoid flying in windy conditions.
Characteristics of Affordable Drones
As previously mentioned, for drones to be considered portable and affordable, they should ideally be foldable, allowing arms and propellers to bend. Not all models offer this feature, so consider it, especially if portability matters to you. Transporting a drone with fixed arms and propellers can be more cumbersome, even with the right backpack, due to increased space requirements.
Size significantly impacts quality, potentially allowing manufacturers to incorporate larger sensors for improved shooting capabilities. Yet, state-of-the-art affordable drones now exist on the market, boasting high-performance sensors suitable for both professional and amateur projects.
Understanding the Structure of Remote Control for Budget Drones
As previously mentioned, the remote control plays a vital role in piloting a drone, especially for extending flight distances beyond the initial position. The design of the remote control closely resembles console joysticks or those found in remote-controlled cars. Typically, it features two primary levers: one for adjusting propeller speed, affecting the drone’s movement, and another for pitch control, enabling forward, backward, and sideways movement. Depending on the model, additional dedicated yaw and adjustment buttons may be present, allowing the drone to rotate and maintain balance.
Essential Features for Drones
As drones advanced technologically, certain functions became standard across the market, even within models priced a few hundred euros. These functions aim to simplify drone piloting, particularly for users encountering unexpected complexities. Notably, Headless mode eliminates drone directionality, making it easier to control by disregarding the drone’s head orientation concerning the remote control. This aids beginners by ensuring consistent movement regardless of the drone’s orientation relative to the controller.
A must-have in modern drones is the automatic return mode, primarily available in GPS-equipped models. This feature enables the drone to autonomously return to the takeoff point using its sensors, acting as proximity sensors to avoid obstacles during the return journey. It serves as a fail-safe measure in cases of signal issues or low battery levels.
Another crucial mode is the Follow Me function, allowing the drone to track the controller’s movements. Utilizing technologies like GPS or subject recognition, this mode ensures the drone captures footage while following predetermined points.
Obstacle Detection and Sensor Implementation
Obstacle detection is a critical feature in drones, preventing collisions with obstacles, vegetation, or trees. Implementations vary from two-way to three-way obstacle detection systems, utilizing sensors like infrared, ToF, LiDAR, or other technologies. These sensors, positioned at the front, bottom, rear, and sides, offer maximum security, especially when present on all sides of the structure. However, their efficiency in low-light conditions may be limited.
Micro SD Memory Cards for Drones
Drones use Micro SD memory cards for storing photos and videos. While some drones possess built-in memory, it’s often insufficient for high-definition video recording, especially at higher bitrates. Choosing the right Micro SD card, aligning with the drone’s specifications or, ideally, surpassing them, is crucial. Parameters like maximum transfer speed declared by the manufacturer and the card’s category must match the drone’s requirements for seamless recording. Categories include U1, U3, V10, V30, V60, and V90, each indicating different recording speeds suitable for varying resolutions and bitrates.
Number of Propellers in Drones
Drones across categories should ideally feature a minimum of 4 propellers, ensuring stability during flight. Models with 6 or 8 propellers are typically reserved for higher-end models aimed at professional film shooting. Damaged propellers compromise overall drone stability.
Leading Manufacturers of Budget Drones
Presently, DJI and Parrot stand out as leading drone manufacturers, acknowledged pillars in the industry known for both high-end and more affordable drone models. However, within the 300 euros threshold, lesser-known brands dominate the market.
Determining Budget Allocation for Drones
The appropriate budget allocation for a drone purchase depends on individual needs and objectives. An amateur user seeking occasional recreational flights may spend less compared to someone using drones for professional projects. The price also varies based on drone type, with models designed specifically for children available at around 50 euros. Prices increase significantly for higher quality and more feature-rich models.
Let’s take a look some of the Best Budget Drones for Photography 2023 below:
IDEA12:
An affordable option designed for 360° obstacle avoidance, featuring a 1080P FPV camera, multiple flight features, and a flight time of 14 minutes.
![]()
IDEA16:
A more advanced model with 3D rotation capabilities, various flight modes, extended flight time, stability in windy conditions, multiple built-in cameras, and 5GHz Wi-Fi transmission.
![]()
Holy Stone HS175D:
Suitable for beginners, capable of 4K video recording, equipped with optical sensors for stable flights, GPS for automatic return, and smart features like automatic subject tracking.
![]()
Loolinn:
Approaching the 300 euros threshold, this drone weighs less than 250 grams, offering up to 50 minutes of flight time, a high-quality camera for 4K photos and 2K videos, GPS functionality for safe flying, and automatic return to the takeoff point.
![]()
Share your thoughts regarding Best Budget Drones for Photography 2023 in our comments section.

Get Coupons
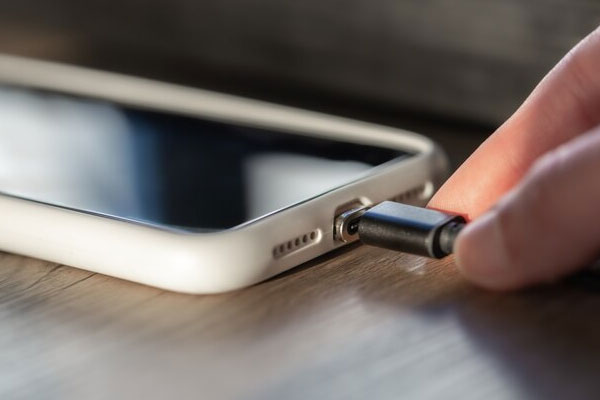
How to Clear the RAM on iPhone in seconds
A Quick Guide on How to Clear RAM on iPhone in Seconds :
For iPhone users, ensuring optimal performance is paramount to a seamless user experience. One effective way to achieve this is by freeing up space in the Random Access Memory (RAM), where the device temporarily stores data needed for running applications.
When the RAM is cluttered, your iPhone may experience sluggishness, longer loading times, and even unexpected app closures. In this guide, we’ll explore the simple yet powerful method of clearing RAM on your iPhone to enhance its performance in just a few seconds.
Understanding the Importance of Clearing RAM:
Random Access Memory (RAM) is a crucial component that allows your iPhone to quickly access and process data required by active applications. As you use various apps throughout the day, RAM gradually fills up. When it reaches capacity, your device may start to slow down as it struggles to access the necessary data.
Clearing RAM is akin to providing a breath of fresh air to your iPhone, ensuring it can efficiently handle new tasks, resulting in improved speed and responsiveness.
Quick Reset for Different iPhone Models:
The easiest and most effective way to clear RAM on an iPhone involves performing a quick reset. The method varies slightly depending on the type of iPhone model you own. Follow these steps:
For iPhone Models with Face ID (iPhone X and newer):
- Press and hold the volume down button and the side button simultaneously.
- When the power off slider appears, drag it to the right to turn off your iPhone.
- Wait approximately 30 seconds and then turn the device back on.
For iPhone Models with Touch ID:
- Press and hold the side button until the slider appears.
- If you own the first-generation iPhone SE, press the top button instead.
- Slide to power off and wait for around 30 seconds before turning the device back on.
- By performing this quick reset, you allow your iPhone to clear out unnecessary data from the RAM, giving it a performance boost.
Additional Tips to Free Up RAM:
While the quick reset is a powerful method, there are other proactive steps you can take to optimize your iPhone’s performance and free up RAM:
Close Unused Applications:
Manually close apps that you’re not actively using, as open apps consume RAM resources.
Manage Notifications:
Turn off notifications for apps that aren’t essential. Unnecessary notifications can contribute to RAM usage.
Stay Updated:
Ensure your iPhone is running the latest version of iOS. Updates often include performance enhancements.
Monitor Storage Space:
Keep an eye on your device’s storage capacity. If it’s near capacity, consider deleting unnecessary files or apps.
Battery and Storage Check:
If your iPhone continues to exhibit slow performance, it may be time to check the battery health or free up additional storage space. Contact Apple support for further assistance.
Conclusion:
In just a matter of seconds, you can breathe new life into your iPhone by clearing its RAM. The quick reset method, coupled with proactive measures like closing unused apps and managing notifications, ensures that your device runs smoothly and efficiently.
By understanding the importance of RAM and regularly optimizing its usage, you can enjoy a responsive and high-performing iPhone. Incorporate these simple steps into your routine, and experience the difference in speed and responsiveness on your beloved device.

Get Coupons
How to Share Wifi Password iPhone
How to Share Wifi Password iPhone? Sharing WiFi Password on iPhone
The convenience of automatically connecting to WiFi at home adds a touch of comfort to our daily lives. Sharing this access with friends and guests is a hospitable gesture, making you the ultimate host.
However, it becomes a challenge when you want to connect someone to your WiFi, and either you don’t know the password or it’s too complex to remember. Fear not – sharing WiFi on iPhone to iPhone is a breeze, and we’ll guide you through the process.
Requirements for WiFi Sharing:
Before delving into the steps, let’s go through the essential requirements to seamlessly share WiFi between iPhones:
Both iPhones Need iOS 16 or iOS 17:
Ensure that both your iPhone and your friend’s iPhone are running the latest version of iOS, either iOS 16 or iOS 17. Staying up-to-date is key to accessing the latest features.
Unlocked and Connected iPhone:
Your iPhone must be unlocked and connected to the WiFi network you intend to share. This ensures a smooth sharing process.
Friend’s Contact Information:
Your friend should be listed as a contact in your address book, and their contact information must include the email associated with their Apple ID. This is crucial for the sharing mechanism to work seamlessly.
WiFi Sharing Steps:
Assuming all the prerequisites are met, follow these straightforward steps to share your WiFi password:
Unlock Your iPhone:
Make sure your iPhone is unlocked and connected to the WiFi network you wish to share.
Ask Your Friend to Connect:
Request your friend to go to Settings on their iPhone, navigate to the WiFi section, and select the desired network. At this point, their iPhone should prompt them for the WiFi password.
Share Password:
On your iPhone, a prompt will appear to share the WiFi password with your friend. Click on the ‘Share Password’ button. This initiates the sharing process via AirDrop, and your friend’s iPhone will automatically receive the password.
Connection Confirmation:
Once the password is shared, your friend’s iPhone will display a message confirming the connection. Your friend is now successfully connected to the same WiFi network without needing to know the password.
By following these steps, you’ve not only made the connection process seamless but also maintained the confidentiality of your WiFi password.
Alternative Method: Using a QR Code
In case your friend doesn’t use an iPhone or has an older iOS version, an alternative method involves creating a QR code to share your WiFi password. Here’s how:
Prepare a QR Code:
Visit the QiFi website from your iPhone, enter your WiFi network name and password, and click on the ‘Generate’ button. This generates a QR code representing your WiFi credentials.
Display QR Code to Friend:
When your friend needs to connect, show them the QR code on your iPhone. Regardless of their phone type, they can use their camera to scan the QR code. This automatically recognizes the WiFi credentials and connects them without manual password input.
Conclusion:
Sharing your WiFi password on iPhone has never been simpler. By keeping both iPhones updated, ensuring the proper settings, and following the steps outlined in this guide, you can effortlessly extend your hospitality to friends and guests.
Whether using the direct sharing method or the QR code alternative, the process is user-friendly and secures your WiFi network. Embrace the ease of sharing and enjoy a connected and hospitable environment for everyone.
Get Coupons
How to Improve iPhone Battery Life with iOS 17
How to Improve iPhone Battery Life :
One of the common grievances among iPhone users revolves around the device’s battery life. Many users find that their iPhones don’t hold a charge as well as other high-end smartphones. While the capacity of the phone’s components may contribute to this issue, there are adjustments and tricks within the iPhone settings that can help extend battery life.
In this detailed guide, we will explore various strategies for improving iPhone battery life, specifically focusing on iOS 17.
Optimizing Screen Features:
One of the prominent features impacting battery life is the always-on screen, particularly on newer devices. To address this, users can disable the always-on screen feature by navigating to Settings, selecting ‘Display and Brightness,’ and deactivating it.
This adjustment can significantly reduce battery drainage, especially for those who don’t find this feature essential.
Managing Screen Brightness:
Another factor affecting battery life is screen brightness. Excessive brightness can lead to faster battery depletion. To address this, ensure that the iPhone’s automatic screen brightness adjustment feature is activated. Users can access this setting by going to ‘Settings,’ selecting ‘Display and Brightness,’ and enabling the ‘Auto-Brightness’ option.
By allowing the phone to adjust brightness based on ambient lighting conditions, users can extend battery life considerably.
Addressing Haptic Feedback:
The haptic feedback of the keyboard, also known as the haptic keyboard, can contribute to unnecessary energy consumption. To conserve energy, users can disable this feature by accessing the iPhone settings. Navigate to ‘Settings,’ choose ‘Sounds and Vibrations,’ then proceed to ‘Keyboard Feedback.’ Here, users can disable the ‘Vibration’ option, minimizing the battery impact of haptic feedback.
Background App Refresh:
One significant feature that can drain battery life is Background App Refresh. While this feature ensures that apps are updated in the background, it can be a resource-intensive process. Users can manage Background App Refresh by going to ‘Settings,’ selecting ‘General,’ and choosing ‘Background App Refresh.’ Here, users can either disable the feature entirely or customize it for specific apps, optimizing battery performance.
App Notifications:
Constant app notifications can contribute to battery drain. Users can conserve battery life by managing app notifications. Navigate to ‘Settings,’ select ‘Notifications,’ and review and adjust notification settings for each app. Disabling unnecessary notifications can help minimize background activities and preserve battery power.
Location Services:
Location services, while useful, can significantly impact battery life. Users can manage location services by going to ‘Settings,’ selecting ‘Privacy,’ and choosing ‘Location Services.’ Here, users can either disable location services entirely or customize settings for individual apps. Turning off location services for non-essential apps can lead to substantial energy savings.
Updates and Background Activities:
Ensuring that the iPhone is running the latest iOS version is crucial for optimal battery performance. Apple frequently releases updates that include bug fixes and optimizations. Additionally, keeping apps updated can address potential performance issues that may impact battery life. Users can check for updates in ‘Settings’ under the ‘General’ section.
Manage Widgets:
Widgets on the iPhone’s home screen can provide quick access to information but may consume unnecessary power if not managed efficiently. Users can customize and remove widgets by entering ‘Edit Home Screen’ mode. Removing widgets that are not frequently used can contribute to improved battery efficiency.
Limit Background Processes:
iOS 17 provides users with the ability to limit the number of background processes running on the device. To manage this, go to ‘Settings,’ select ‘General,’ and choose ‘Background App Management.’ Here, users can set limitations on background processes, ensuring that only essential activities are running when the device is not in use.
Optimize Mail Settings:
Fetching emails frequently can contribute to battery drain. Users can optimize mail settings by going to ‘Settings,’ selecting ‘Mail,’ and choosing ‘Accounts.’ Here, users can adjust the frequency of mail fetching or switch to manual fetching for non-essential accounts, conserving battery power.
Conclusion:
Improving iPhone battery life with iOS 17 involves a combination of adjusting settings, managing features, and adopting efficient practices. By following the detailed tips outlined in this guide, users can optimize their iPhone’s battery performance and enjoy extended usage between charges.
Whether it’s fine-tuning screen settings, managing app activities, or staying up-to-date with software updates, these strategies empower users to make the most out of their iPhone’s battery life. Incorporate these practices into your routine, and experience a more efficient and long-lasting iPhone battery performance with iOS 17.

What to do in Genoa – Travel To Genoa

Things to do in Rimini Italy

Where to Stay in Trento Italy

Best Hotels in Bangkok City Center

Best Attractions in Kuala Lumpur Malaysia

Things to See in Cebu Philippines

Things to do in New Holland

Best Places in St Petersburg Florida for Boating

-
 Travel9 months ago
Best Spinning Rod for Bass 2024
-

 Technology9 months ago
Best Lure for Trout 2024
-
 Travel9 months ago
Best Hunting and Fishing Clothing 2024
-

 Travel9 months ago
Best Robot Vacuum Cleaners 2024
-

 Technology9 months ago
Best Floats for Night Fishing
-

 News6 months ago
Valentine’s Deals
-

 Technology9 months ago
Best Twisters for Fishing 2024
-
 Travel9 months ago
Best Spinning Fishing Reels for Bass 2024