


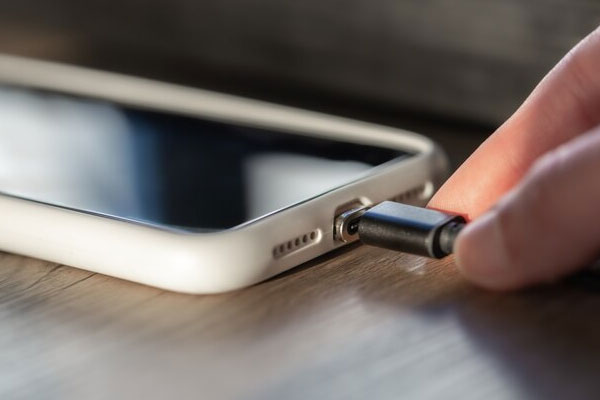
Technology
How to Use a VPN?

Get Coupons


How to Use a VPN?
How to Use a VPN : VPN networks are gaining popularity rapidly, responding to the growing concerns about privacy violations and online anonymity breaches. They have become a common solution for bypassing censorship and overcoming geographical restrictions on services like Netflix.
In this practical guide, we’ll delve into the basics of VPN usage, exploring why they are worth considering and providing step-by-step instructions on how to use them effectively.
Understanding VPN: A Brief Overview
VPN stands for a virtual private network, and its rising popularity is fueled by the need for enhanced privacy and the ability to navigate the internet without restrictions. As an acronym for Virtual Private Network, a VPN offers a secure and encrypted connection, shielding users from online snooping, especially when accessing public hotspots while traveling with laptops, tablets, or smartphones.
Reasons to Consider Using a VPN
Privacy Protection: VPNs play a crucial role in safeguarding online privacy by encrypting internet traffic, making it difficult for third parties to intercept or monitor user activities.
Access to Blocked Content: VPNs enable users to unblock websites and services restricted in their current location. For instance, users in Poland often use VPNs to gain access to American Netflix, while those outside Poland can access national services and websites blocked in their current country.
How to Use a VPN: A Step-by-Step Guide
Step 1: Choose a VPN Subscription
The first step towards leveraging the benefits of a VPN is to select a suitable subscription. For example, if opting for PureVPN, visit their website, choose a plan, and follow the instructions for subscription. After selecting your plan, click on “Get PureVPN Now” to initiate the process.
Step 2: Download and Run the VPN Client
Upon completing the subscription process, download the VPN client from the provider’s website. Run the client and choose the preferred network mode based on your requirements:
Stream: Ideal for receiving multimedia from services like Netflix.
Internet Freedom: Allows bypassing censorship and geolocation blocks.
Security/Privacy: Enhances privacy and security levels.
File-Sharing: Specifically designed for sharing files.
Step 3: Choose Server Location
After selecting the network mode, choose the server location. Users can either specify a particular server or rely on the application’s automatic selection. In PureVPN and other VPN services, users may have the option to customize settings, often found under a gear wheel icon or in dedicated tabs.
It’s crucial to explore these settings, ensuring essential features like the kill switch are activated. The kill switch immediately disconnects from the network if the VPN connection is interrupted, preventing potential exposure of user activities.
Step 4: Verify VPN Functionality
To ensure that the VPN is working correctly, users can use tools like BrowserSPY’s Geolocation page to check the displayed IP location. The IP location should match the server location selected during setup. If the IP location aligns with the chosen server location, the VPN is successfully active, providing a secure and unrestricted internet experience.
Exploring Additional Benefits of VPN Usage
While the basic steps outlined above cover the fundamental aspects of using a VPN, it’s essential to explore additional benefits and scenarios where VPNs prove invaluable.
1. Enhanced Security on Public Wi-Fi
When connecting to public Wi-Fi networks, which are often inadequately secured, a VPN acts as a crucial layer of protection. It encrypts the data transmitted, preventing potential hackers from exploiting vulnerabilities in public hotspots.
2. Bypassing Censorship and Geographical Restrictions
VPN’s Internet Freedom mode allows users to navigate the internet without encountering censorship or geographical blocks. This proves particularly useful when accessing websites and services that may be restricted in certain regions.
3. Customizing VPN Settings for Optimal Security
Exploring VPN settings allows users to customize their experience for optimal security. Features like split tunneling, DNS leak protection, and protocol selection contribute to a more secure and tailored VPN connection.
4. Ensuring Privacy with Kill Switch Functionality
Activating the kill switch is crucial for maintaining privacy. In the event of a VPN connection interruption, the kill switch immediately severs the internet connection, preventing any potential exposure of sensitive data.
Conclusion:
In conclusion, using a VPN is a straightforward process that offers a myriad of benefits. From safeguarding privacy and accessing blocked content to securing public Wi-Fi connections, VPNs have become an indispensable tool in the digital age.
By following the simple steps outlined in this guide, users can harness the power of VPNs and enjoy the internet without restrictions, confident in the knowledge that their online activities remain private and secure. As VPN technology continues to evolve, its role in ensuring online safety and freedom becomes increasingly vital.

Get Coupons
How to Clear the RAM on iPhone in seconds
A Quick Guide on How to Clear RAM on iPhone in Seconds :
For iPhone users, ensuring optimal performance is paramount to a seamless user experience. One effective way to achieve this is by freeing up space in the Random Access Memory (RAM), where the device temporarily stores data needed for running applications.
When the RAM is cluttered, your iPhone may experience sluggishness, longer loading times, and even unexpected app closures. In this guide, we’ll explore the simple yet powerful method of clearing RAM on your iPhone to enhance its performance in just a few seconds.
Understanding the Importance of Clearing RAM:
Random Access Memory (RAM) is a crucial component that allows your iPhone to quickly access and process data required by active applications. As you use various apps throughout the day, RAM gradually fills up. When it reaches capacity, your device may start to slow down as it struggles to access the necessary data.
Clearing RAM is akin to providing a breath of fresh air to your iPhone, ensuring it can efficiently handle new tasks, resulting in improved speed and responsiveness.
Quick Reset for Different iPhone Models:
The easiest and most effective way to clear RAM on an iPhone involves performing a quick reset. The method varies slightly depending on the type of iPhone model you own. Follow these steps:
For iPhone Models with Face ID (iPhone X and newer):
- Press and hold the volume down button and the side button simultaneously.
- When the power off slider appears, drag it to the right to turn off your iPhone.
- Wait approximately 30 seconds and then turn the device back on.
For iPhone Models with Touch ID:
- Press and hold the side button until the slider appears.
- If you own the first-generation iPhone SE, press the top button instead.
- Slide to power off and wait for around 30 seconds before turning the device back on.
- By performing this quick reset, you allow your iPhone to clear out unnecessary data from the RAM, giving it a performance boost.
Additional Tips to Free Up RAM:
While the quick reset is a powerful method, there are other proactive steps you can take to optimize your iPhone’s performance and free up RAM:
Close Unused Applications:
Manually close apps that you’re not actively using, as open apps consume RAM resources.
Manage Notifications:
Turn off notifications for apps that aren’t essential. Unnecessary notifications can contribute to RAM usage.
Stay Updated:
Ensure your iPhone is running the latest version of iOS. Updates often include performance enhancements.
Monitor Storage Space:
Keep an eye on your device’s storage capacity. If it’s near capacity, consider deleting unnecessary files or apps.
Battery and Storage Check:
If your iPhone continues to exhibit slow performance, it may be time to check the battery health or free up additional storage space. Contact Apple support for further assistance.
Conclusion:
In just a matter of seconds, you can breathe new life into your iPhone by clearing its RAM. The quick reset method, coupled with proactive measures like closing unused apps and managing notifications, ensures that your device runs smoothly and efficiently.
By understanding the importance of RAM and regularly optimizing its usage, you can enjoy a responsive and high-performing iPhone. Incorporate these simple steps into your routine, and experience the difference in speed and responsiveness on your beloved device.

Get Coupons
How to Share Wifi Password iPhone
How to Share Wifi Password iPhone? Sharing WiFi Password on iPhone
The convenience of automatically connecting to WiFi at home adds a touch of comfort to our daily lives. Sharing this access with friends and guests is a hospitable gesture, making you the ultimate host.
However, it becomes a challenge when you want to connect someone to your WiFi, and either you don’t know the password or it’s too complex to remember. Fear not – sharing WiFi on iPhone to iPhone is a breeze, and we’ll guide you through the process.
Requirements for WiFi Sharing:
Before delving into the steps, let’s go through the essential requirements to seamlessly share WiFi between iPhones:
Both iPhones Need iOS 16 or iOS 17:
Ensure that both your iPhone and your friend’s iPhone are running the latest version of iOS, either iOS 16 or iOS 17. Staying up-to-date is key to accessing the latest features.
Unlocked and Connected iPhone:
Your iPhone must be unlocked and connected to the WiFi network you intend to share. This ensures a smooth sharing process.
Friend’s Contact Information:
Your friend should be listed as a contact in your address book, and their contact information must include the email associated with their Apple ID. This is crucial for the sharing mechanism to work seamlessly.
WiFi Sharing Steps:
Assuming all the prerequisites are met, follow these straightforward steps to share your WiFi password:
Unlock Your iPhone:
Make sure your iPhone is unlocked and connected to the WiFi network you wish to share.
Ask Your Friend to Connect:
Request your friend to go to Settings on their iPhone, navigate to the WiFi section, and select the desired network. At this point, their iPhone should prompt them for the WiFi password.
Share Password:
On your iPhone, a prompt will appear to share the WiFi password with your friend. Click on the ‘Share Password’ button. This initiates the sharing process via AirDrop, and your friend’s iPhone will automatically receive the password.
Connection Confirmation:
Once the password is shared, your friend’s iPhone will display a message confirming the connection. Your friend is now successfully connected to the same WiFi network without needing to know the password.
By following these steps, you’ve not only made the connection process seamless but also maintained the confidentiality of your WiFi password.
Alternative Method: Using a QR Code
In case your friend doesn’t use an iPhone or has an older iOS version, an alternative method involves creating a QR code to share your WiFi password. Here’s how:
Prepare a QR Code:
Visit the QiFi website from your iPhone, enter your WiFi network name and password, and click on the ‘Generate’ button. This generates a QR code representing your WiFi credentials.
Display QR Code to Friend:
When your friend needs to connect, show them the QR code on your iPhone. Regardless of their phone type, they can use their camera to scan the QR code. This automatically recognizes the WiFi credentials and connects them without manual password input.
Conclusion:
Sharing your WiFi password on iPhone has never been simpler. By keeping both iPhones updated, ensuring the proper settings, and following the steps outlined in this guide, you can effortlessly extend your hospitality to friends and guests.
Whether using the direct sharing method or the QR code alternative, the process is user-friendly and secures your WiFi network. Embrace the ease of sharing and enjoy a connected and hospitable environment for everyone.
Get Coupons
How to Improve iPhone Battery Life with iOS 17
How to Improve iPhone Battery Life :
One of the common grievances among iPhone users revolves around the device’s battery life. Many users find that their iPhones don’t hold a charge as well as other high-end smartphones. While the capacity of the phone’s components may contribute to this issue, there are adjustments and tricks within the iPhone settings that can help extend battery life.
In this detailed guide, we will explore various strategies for improving iPhone battery life, specifically focusing on iOS 17.
Optimizing Screen Features:
One of the prominent features impacting battery life is the always-on screen, particularly on newer devices. To address this, users can disable the always-on screen feature by navigating to Settings, selecting ‘Display and Brightness,’ and deactivating it.
This adjustment can significantly reduce battery drainage, especially for those who don’t find this feature essential.
Managing Screen Brightness:
Another factor affecting battery life is screen brightness. Excessive brightness can lead to faster battery depletion. To address this, ensure that the iPhone’s automatic screen brightness adjustment feature is activated. Users can access this setting by going to ‘Settings,’ selecting ‘Display and Brightness,’ and enabling the ‘Auto-Brightness’ option.
By allowing the phone to adjust brightness based on ambient lighting conditions, users can extend battery life considerably.
Addressing Haptic Feedback:
The haptic feedback of the keyboard, also known as the haptic keyboard, can contribute to unnecessary energy consumption. To conserve energy, users can disable this feature by accessing the iPhone settings. Navigate to ‘Settings,’ choose ‘Sounds and Vibrations,’ then proceed to ‘Keyboard Feedback.’ Here, users can disable the ‘Vibration’ option, minimizing the battery impact of haptic feedback.
Background App Refresh:
One significant feature that can drain battery life is Background App Refresh. While this feature ensures that apps are updated in the background, it can be a resource-intensive process. Users can manage Background App Refresh by going to ‘Settings,’ selecting ‘General,’ and choosing ‘Background App Refresh.’ Here, users can either disable the feature entirely or customize it for specific apps, optimizing battery performance.
App Notifications:
Constant app notifications can contribute to battery drain. Users can conserve battery life by managing app notifications. Navigate to ‘Settings,’ select ‘Notifications,’ and review and adjust notification settings for each app. Disabling unnecessary notifications can help minimize background activities and preserve battery power.
Location Services:
Location services, while useful, can significantly impact battery life. Users can manage location services by going to ‘Settings,’ selecting ‘Privacy,’ and choosing ‘Location Services.’ Here, users can either disable location services entirely or customize settings for individual apps. Turning off location services for non-essential apps can lead to substantial energy savings.
Updates and Background Activities:
Ensuring that the iPhone is running the latest iOS version is crucial for optimal battery performance. Apple frequently releases updates that include bug fixes and optimizations. Additionally, keeping apps updated can address potential performance issues that may impact battery life. Users can check for updates in ‘Settings’ under the ‘General’ section.
Manage Widgets:
Widgets on the iPhone’s home screen can provide quick access to information but may consume unnecessary power if not managed efficiently. Users can customize and remove widgets by entering ‘Edit Home Screen’ mode. Removing widgets that are not frequently used can contribute to improved battery efficiency.
Limit Background Processes:
iOS 17 provides users with the ability to limit the number of background processes running on the device. To manage this, go to ‘Settings,’ select ‘General,’ and choose ‘Background App Management.’ Here, users can set limitations on background processes, ensuring that only essential activities are running when the device is not in use.
Optimize Mail Settings:
Fetching emails frequently can contribute to battery drain. Users can optimize mail settings by going to ‘Settings,’ selecting ‘Mail,’ and choosing ‘Accounts.’ Here, users can adjust the frequency of mail fetching or switch to manual fetching for non-essential accounts, conserving battery power.
Conclusion:
Improving iPhone battery life with iOS 17 involves a combination of adjusting settings, managing features, and adopting efficient practices. By following the detailed tips outlined in this guide, users can optimize their iPhone’s battery performance and enjoy extended usage between charges.
Whether it’s fine-tuning screen settings, managing app activities, or staying up-to-date with software updates, these strategies empower users to make the most out of their iPhone’s battery life. Incorporate these practices into your routine, and experience a more efficient and long-lasting iPhone battery performance with iOS 17.

What to do in Genoa – Travel To Genoa

Things to do in Rimini Italy

Where to Stay in Trento Italy

Best Hotels in Bangkok City Center

Best Attractions in Kuala Lumpur Malaysia

Things to See in Cebu Philippines

Things to do in New Holland

Best Places in St Petersburg Florida for Boating

-
 Travel9 months ago
Best Spinning Rod for Bass 2024
-

 Technology9 months ago
Best Lure for Trout 2024
-
 Travel9 months ago
Best Hunting and Fishing Clothing 2024
-

 Travel9 months ago
Best Robot Vacuum Cleaners 2024
-

 Technology9 months ago
Best Floats for Night Fishing
-

 News6 months ago
Valentine’s Deals
-

 Technology9 months ago
Best Twisters for Fishing 2024
-
 Travel9 months ago
Best Spinning Fishing Reels for Bass 2024